blender-track-exporter
Home | Download | Guide | Assets | Errors | GitHub
This is not a full track creation guide, just the very basics to get started exporting stages to RBR. Eventually we’ll have a full guide on best practices and techniques, but until then it’s expected that you already know what you’re doing or you can learn from others via the track building Discord server.
Note that since the addon is still in beta, things are subject to change.
Please note that your blender language must be set to English in order for the addon to work correctly. Eventually, when this bug is fixed, this restriction will be lifted. But for now, use English or you’ll run into all sorts of problems.
Addon Setup
After installing the addon, you should set up your RBR export directories. Find the RBR track addon in your list of addons in the blender preferences pane, and at the bottom click “Add RBR export directory”.
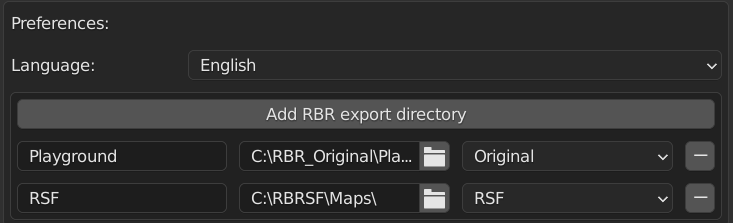
You can add as many as you like for different RBR installations. Name them
something suitable with the left hand field, and make sure the directory points
to the Maps directory of the RBR installation. Set the RBR distribution type
appropriately - for RSF stages will be placed into their own subdirectory
automatically, but Original will just be placed into the Maps directory.
When you’re done, save the preferences. If you just close the window without saving, it won’t work.

“Hello World”
We’ll go over the minimum set of things you need to export your first track for RBR. Naturally this will only use a couple of features (also known as RBR object types), for a more comprehensive overview see Features.
This is not a blender tutorial - just a tutorial on how to export a track.
Create a new blend file and clear out any objects so you have a blank canvas.
Ground
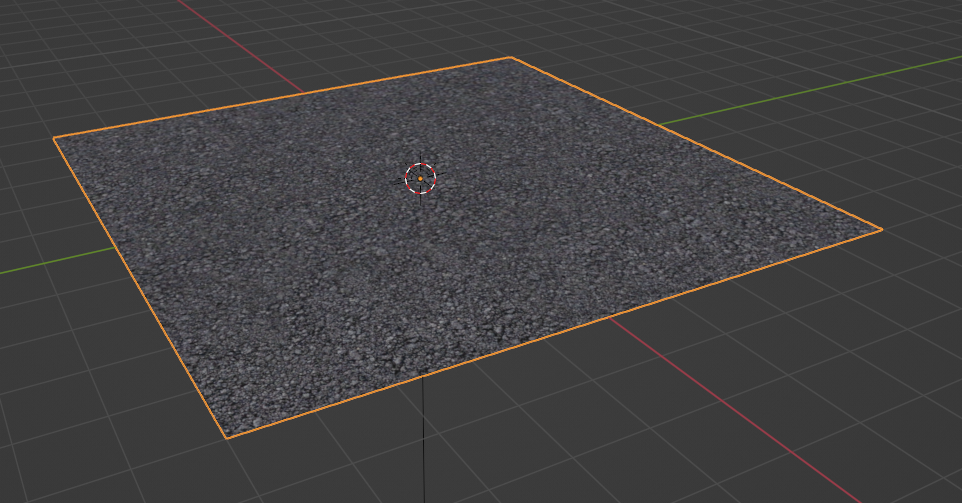
Let’s start by creating the ground mesh. Go to Add > Mesh > Grid to create a
simple flat ground plane, and scale it up by 10 so it’s big enough to drive on.
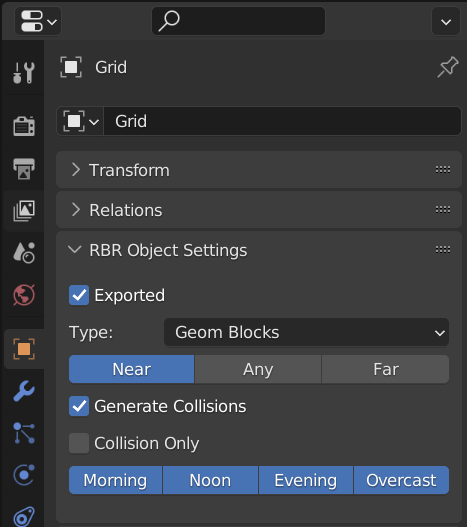
In the object properties panel, find the section named “RBR Object Settings”. Change the type to “Geom Block”, and enable “Generate Collisions”. This is the object type you should use for your ground mesh and buildings. Leave it set to “Near”.
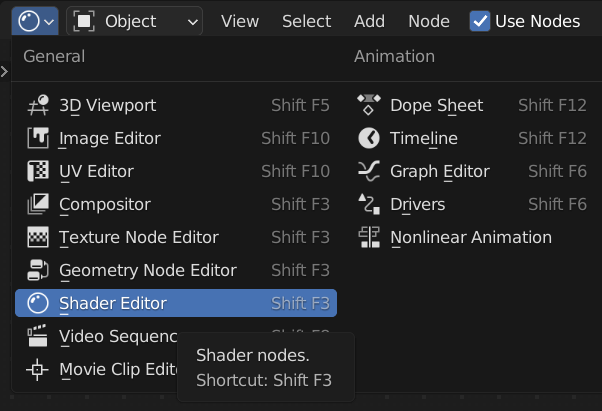
Now we’ll set up a simple textured material. Create a new material for your object from the “Material Properties” panel. Open up the shader editor:
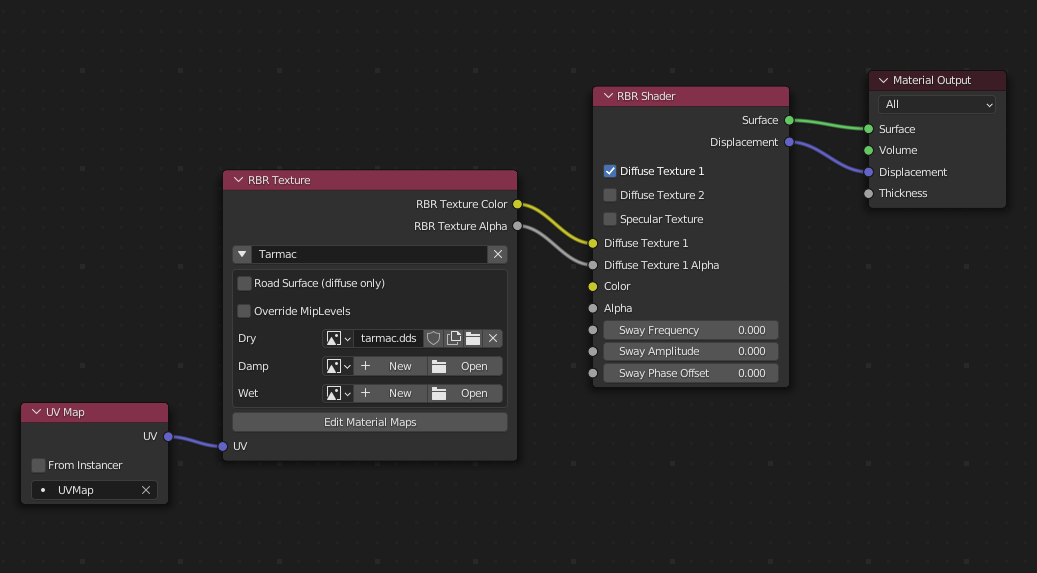
Remove the “Principled BSDF” shader node. For exporting to RBR, you must use the
shader nodes provided by the addon. Add -> RBR Nodes -> RBR Shader will add
the main shader node which you can use for any RBR object mesh, although not all
features are supported for all object types. Enable “Diffuse Texture 1” to use a
texture for this material.
Add an RBR Texture node, and click “New” to create a new RBR texture. Rename
it to something suitable, and connect your nodes up as such:
The RBR Texture node handles dry/damp/wet and new/normal/worn conditions.
new/normal/worn are available for textures marked as “Road Surface” - this can
only be used in diffuse texture slots, and it enables the texture image to vary
based on road condition. We’ll just use dry for now. Select an image to use for
dry conditions. All textures must be DXT1/3/5 - we use DXT1 which is best for
opaque textures. The sizes of the texture must be a power of two, e.g. 512,
1024, 2048, etc - but it does not need to be square.
Switch to material preview mode to view what it will look like in game.
Your mesh will appear totally black - we’re missing a couple of things!
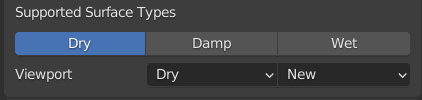
Switch to the “Scene Properties” panel, and scroll down to find “RBR Track
Settings”. This governs the supported surface types for your stage
(dry/damp/wet) and the weather settings supported by the stage. By default, we
are exporting a morning “tint set” (and the resulting track data is stored in
files with _M suffix). One track can have multiple tint sets, and in blender
each tint set requires a new scene. For now, we’ll just leave it as morning and
only export one tint set.
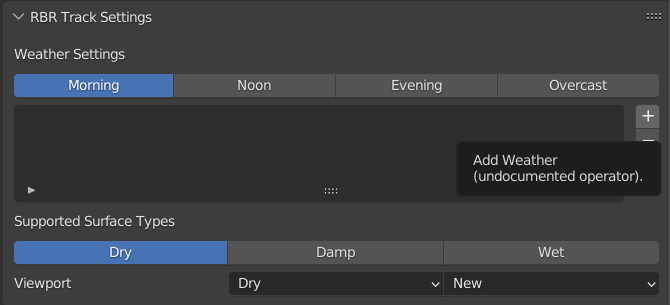
Click the + button to add a weather type to the stage.
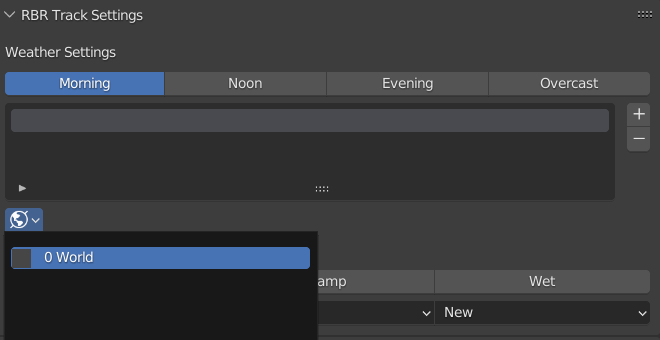
This will create an empty slot for putting a new weather type in. In Blender,
weathers are represented by World objects, and you can select the default
world from the dropdown box which appears:
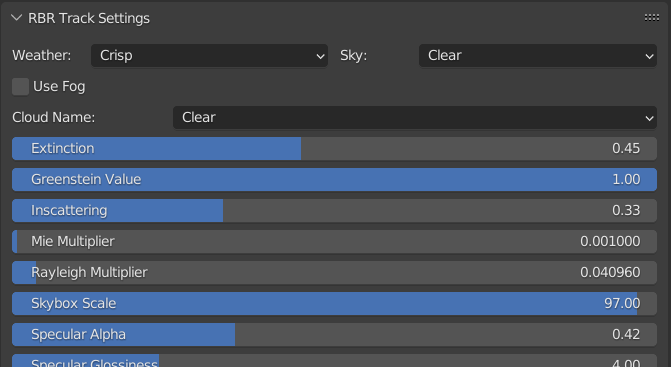
The default is “crisp clear” weather. We’ll leave everything as default, but you
can tweak the values by going to the World panel (the button immediately below
the scene panel button) and finding the “RBR Track Settings” panel there.
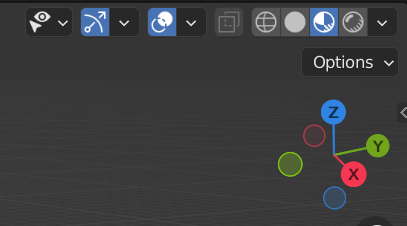
The addon provides a real time preview which exactly matches the way
your stage will appear in game with the same weather settings. In the 3D editor
view, click Add > Light > Sun, and set the “RBR Object Type” to “Sun”. The sun
direction will be taken from this object.
With that, your texture should now be visible on your object:
We’re not quite done with the ground yet, we need to do physics mapping so the addon knows what materials our mesh is made from. Open the UV or image editor in one pane, and the shader editor beneath it. To physics map a particular texture, click “Edit Material Maps” in the RBR texture node. The image will open up in the image editor:
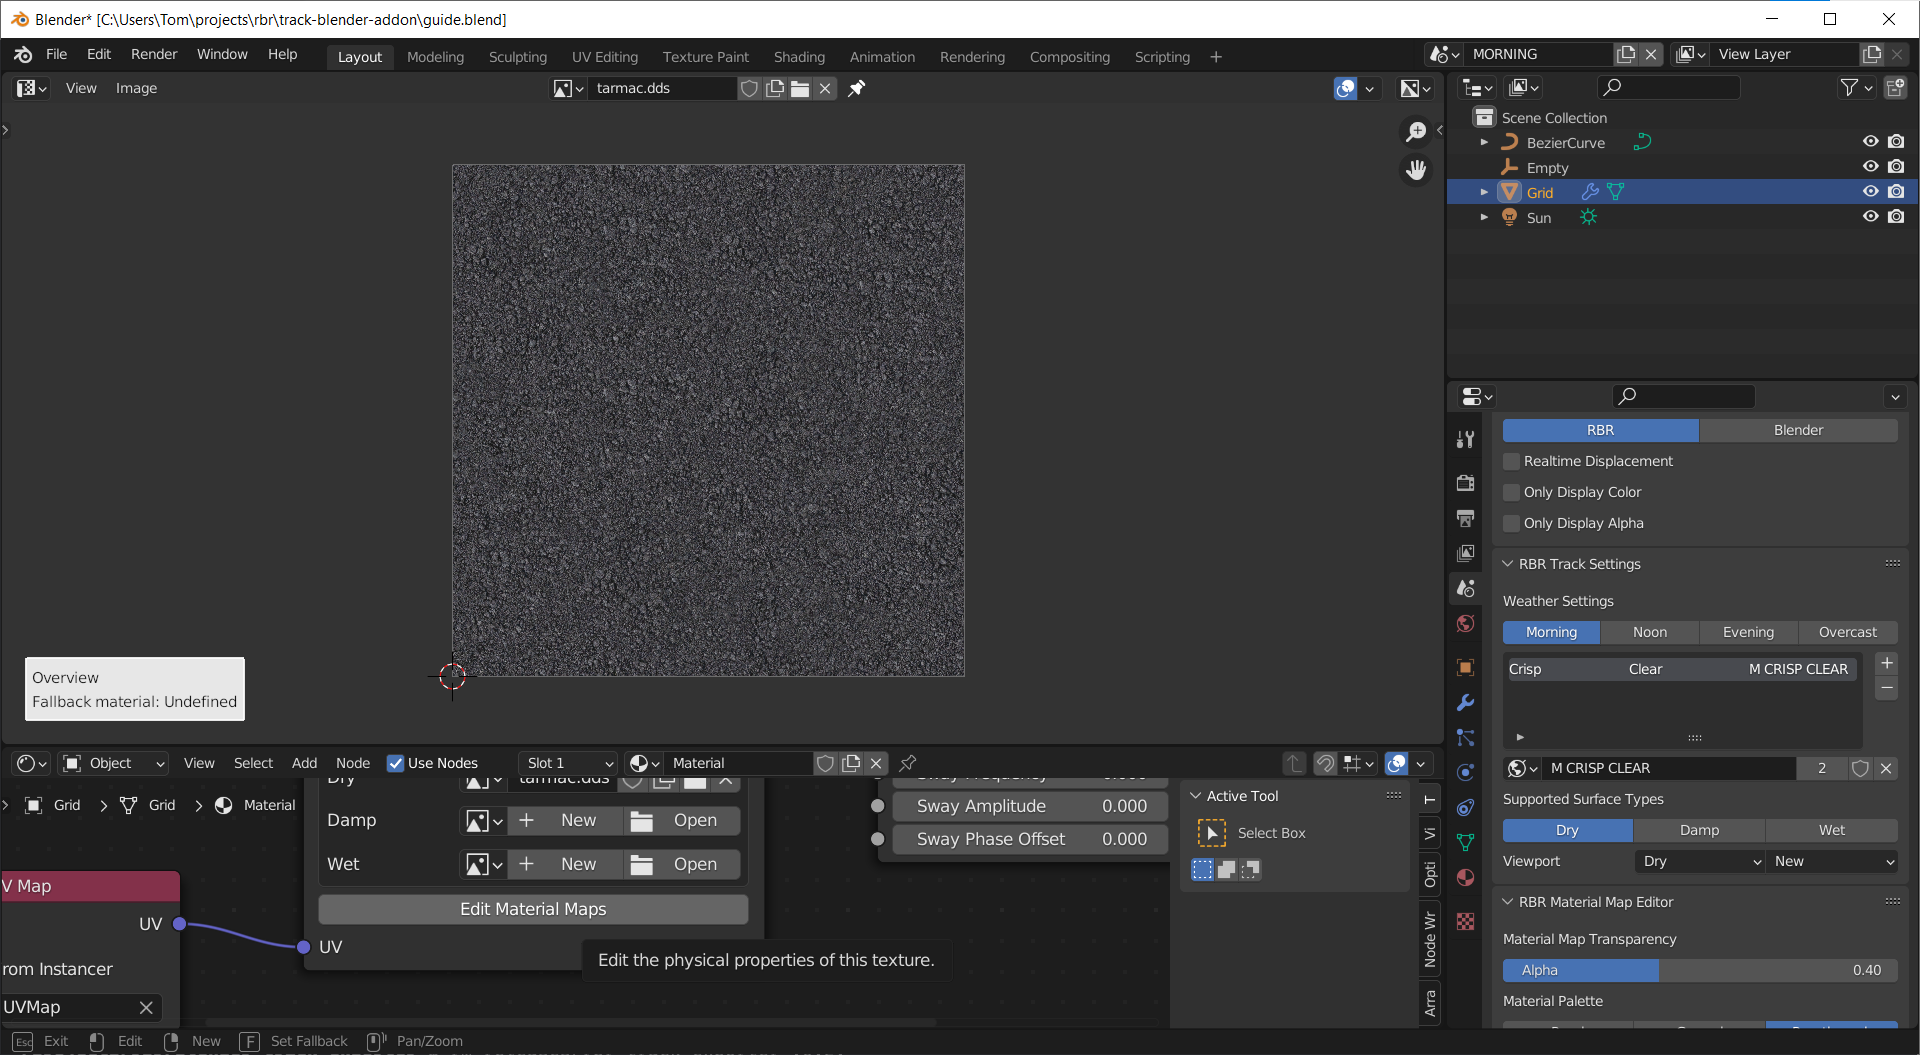
The controls of the material editor are displayed at the bottom of the screen.
From “Overview” mode, right click to start creating a new map. Note that the controls at the bottom will update depending on the editor mode! In “Create New Map” mode you can click and drag to define a new material map area. When you release the button you’ll be back in overview mode, where you can select your map to resize and move it:

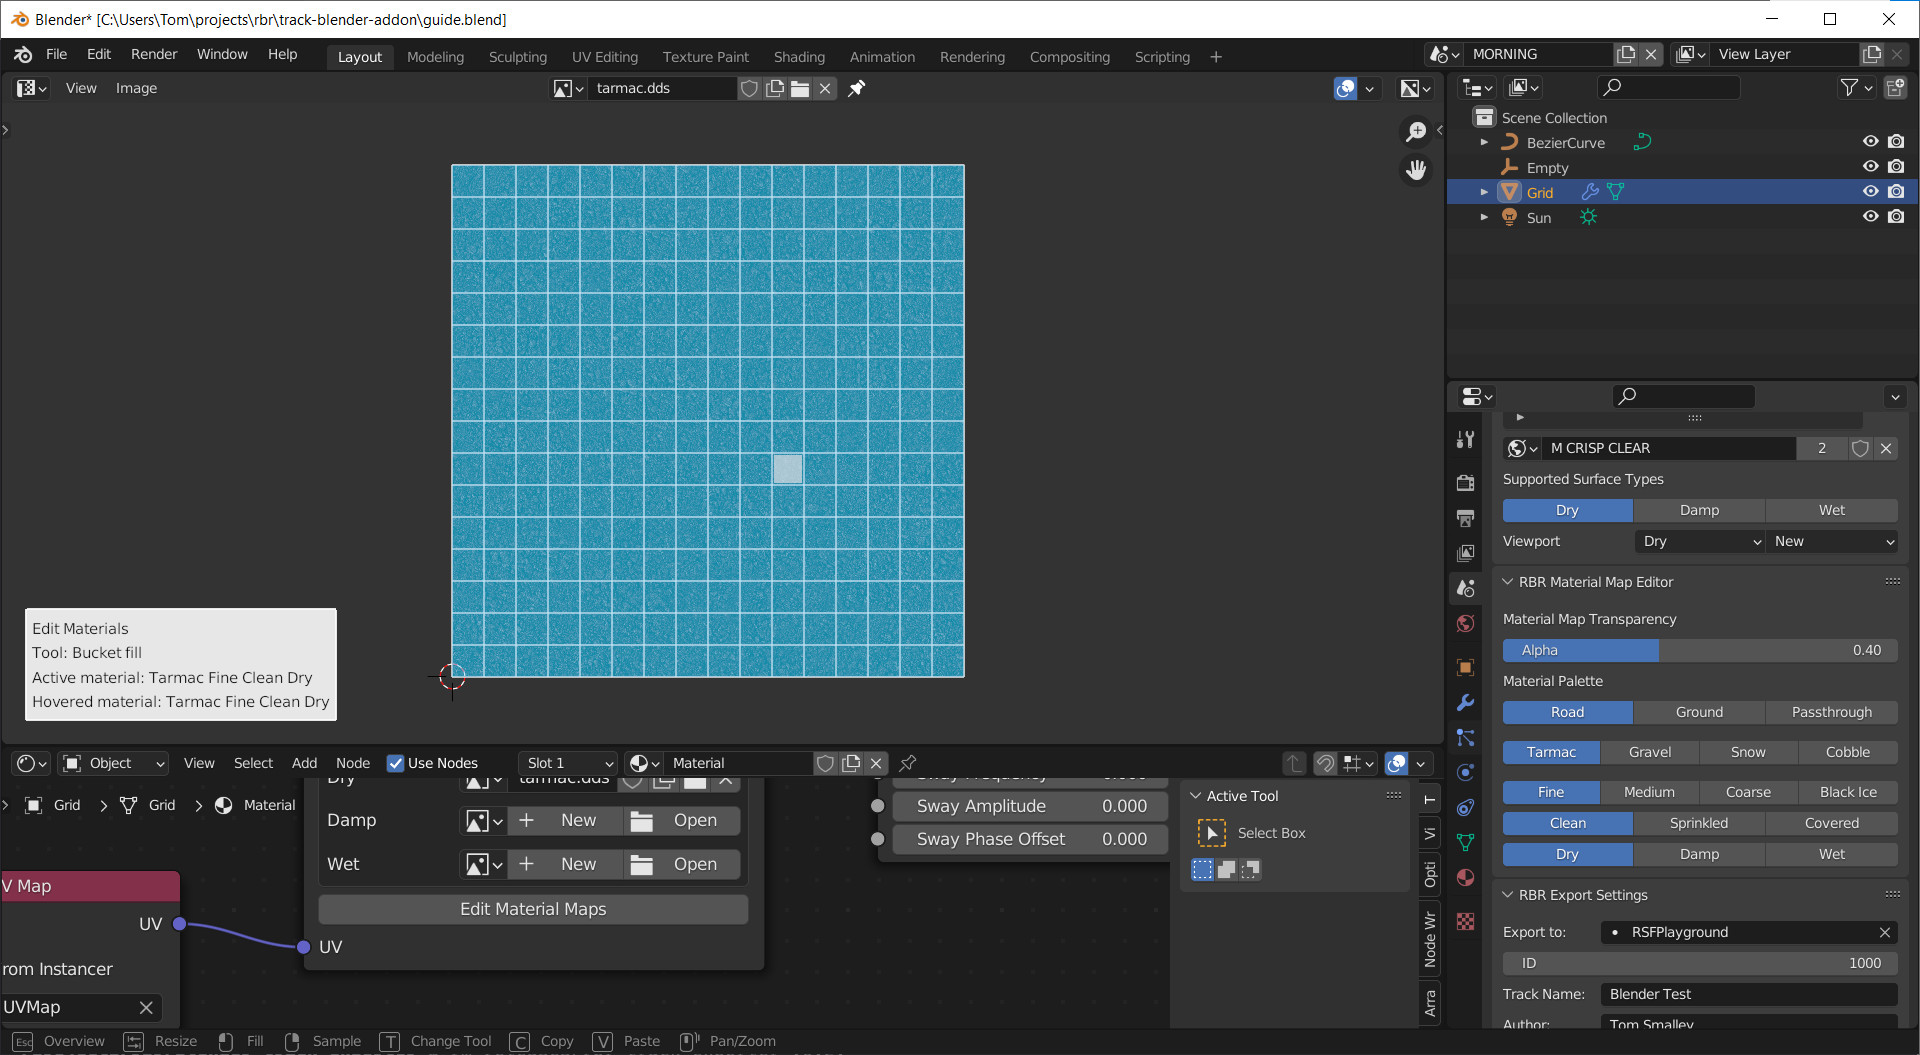
Tap the X key and the Y key to mark the map as repeating in X and Y
directions. This will lock the map to the texture dimensions, and allow the
addon to be smarter when exporting if your UV map does not fit within the
texture bounds. Tap Tab to enter material painting mode, then T to switch to
fill mode. Click anywhere within the map to fill the area with a material. By
default it’s clean, dry tarmac, but you can pick the material from the scene
panel under the “RBR Material Map Editor” heading:
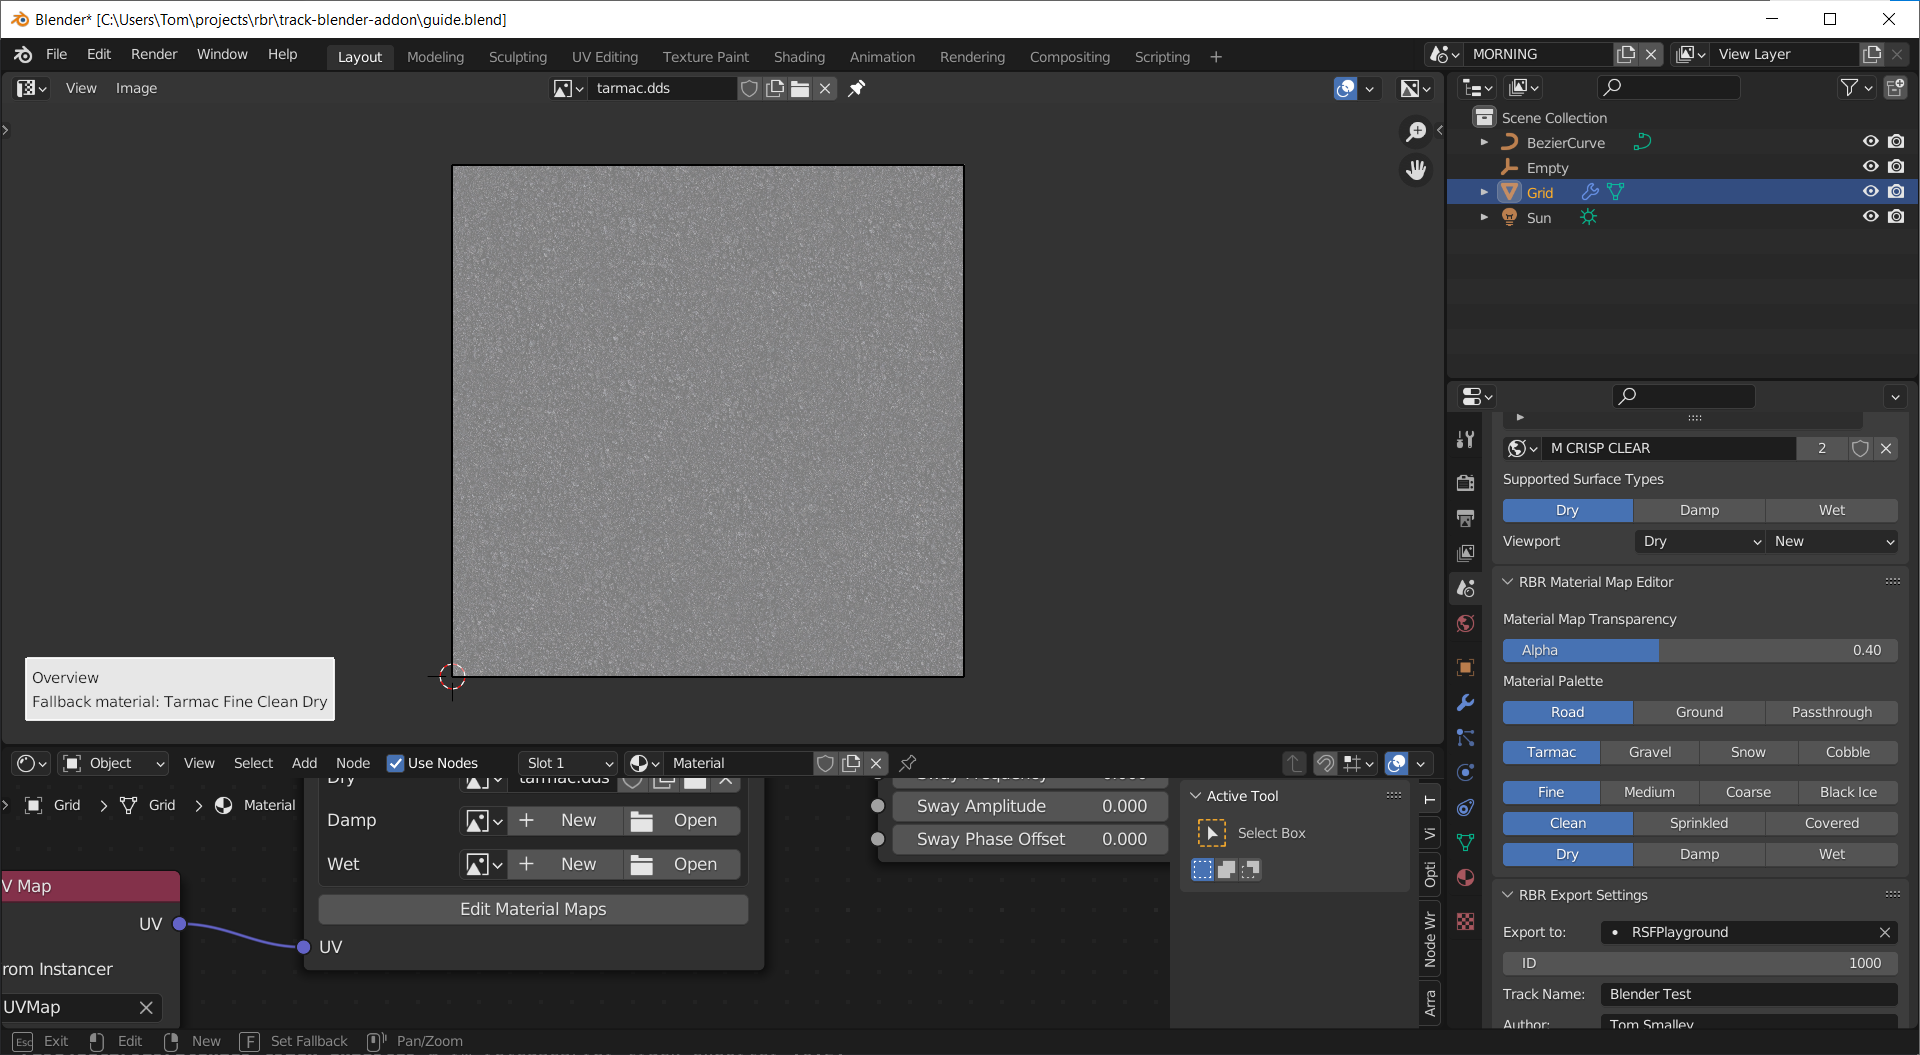
“Repeating” material maps like the one above can only work with UV triangles that are less than half the width and height of the image (the technical reason for this is that RBR does not support UV wrapping on the collision mesh). For the larger triangles, we need a “fallback material” which will be used anywhere the fine grained maps don’t cover.
Tap Esc to go back to the overview mode. The “Fallback Material” is displayed
in the bottom left. Tap the F key to set the fallback material from the
currently selected material in the material palette.
This fallback material and the materials painted within each material map can be different for each dry/damp/wet and new/normal/worn combination. You can select which one you are currently editing from the scene panel “Viewport” properties.
Tap Esc a few times to back out of the material map editor, and switch back to
the 3D viewport.
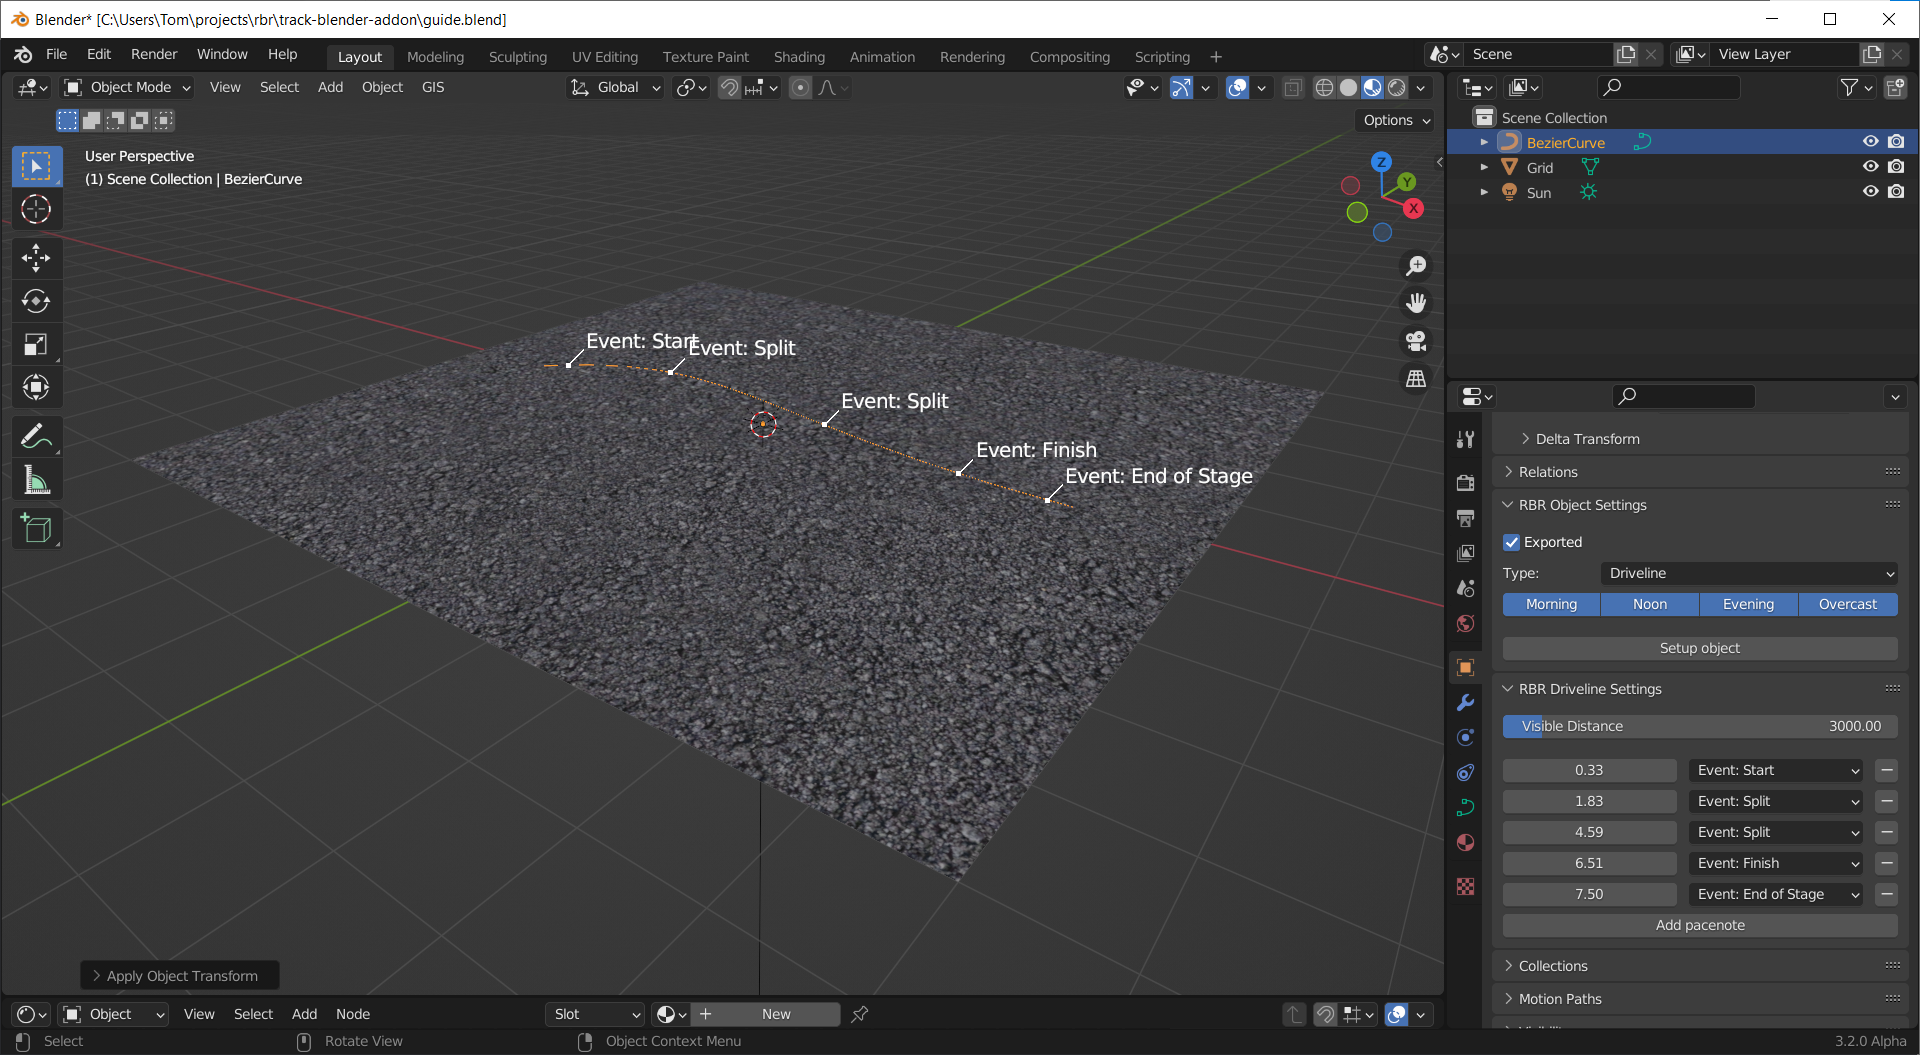
Driveline
Click Add > Curve > Bezier and set the “RBR Object Type” to “Driveline”. This
curve defines the path the car is expected to take through the stage. It also
drives the pacenotes, which you can add in the “RBR Driveline Settings” panel in
the object properties pane. A few pacenotes are special events defining the
start line, two splits, the finish line, and the end of the stage. The end of
the stage will immediately end the stage when the car reaches it.
Scale the driveline curve up to fill the area. Make sure you apply the scale
(see Object > Apply > Scale), or the pacenotes won’t appear in the correct
places. Add the special events and space them out along the driveline:
Technically these aren’t needed just for quickly testing, but they are needed for your stage to function correctly. Try to ensure the driveline covers from before the start of the stage until after the end to avoid accidental penalties.
Car Location
Click Add > Empty > Arrows and set the “RBR Object Type” to “Car Location”.
This is the place the car spawns when the stage is loaded. It should be slightly
behind the start line, or the driver will get a penalty when the stage starts.
The car spawns pointing along the Y axis of the arrows, with the rear axle
aligned with the X axis.
Export Settings
Go to the scene panel and find “RBR Export Settings”. This is where you pick the directory you want to export to, and give your stage an ID for testing. The ID you choose depends on your installation - you need to choose an ID which isn’t already in use (or you’ll overwrite those files). Check your maps folder and pick a sufficiently large number - for me, track 101 is free.
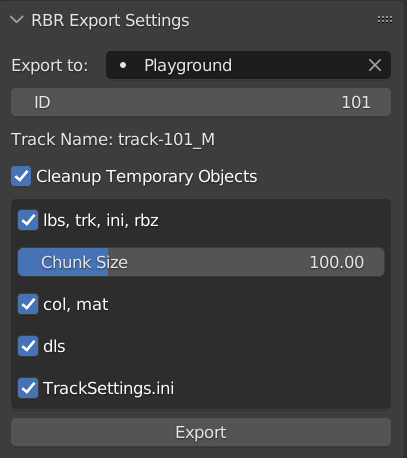
With that, click “Export” and your stage should be created in your export directory.
I suggest opening the console Window > Toggle System Console because the addon
will log what it is doing, useful for when exports fail or when exports take a
few minutes if your stage is complicated. When exports do fail, the addon should
emit error codes like E0101. See Errors for explanations of error
codes emitted by the addon. If you don’t get an error code, please let me know,
because that’s probably a bug.
Testing
Actually driving the stage requires different steps depending on your RBR
installation. For RSF, you should be able to find your stage in the Test
stages category without having to edit any other game files. For other plugins,
e.g. the Czech plugin, you’ll need to manually append the contents of:
Tracks<track-id>.initoTracks.iniTrackSettings<track-id>.initoTrackSettings.ini
After that, launch your game, and drive your new stage!
Conclusion
Hopefully that gives you a quick overview of where to start with the track exporter addon. I must emphasise that this is the bare minimum needed to get a stage to load in RBR. For a more comprehensive overview of object types see Features.